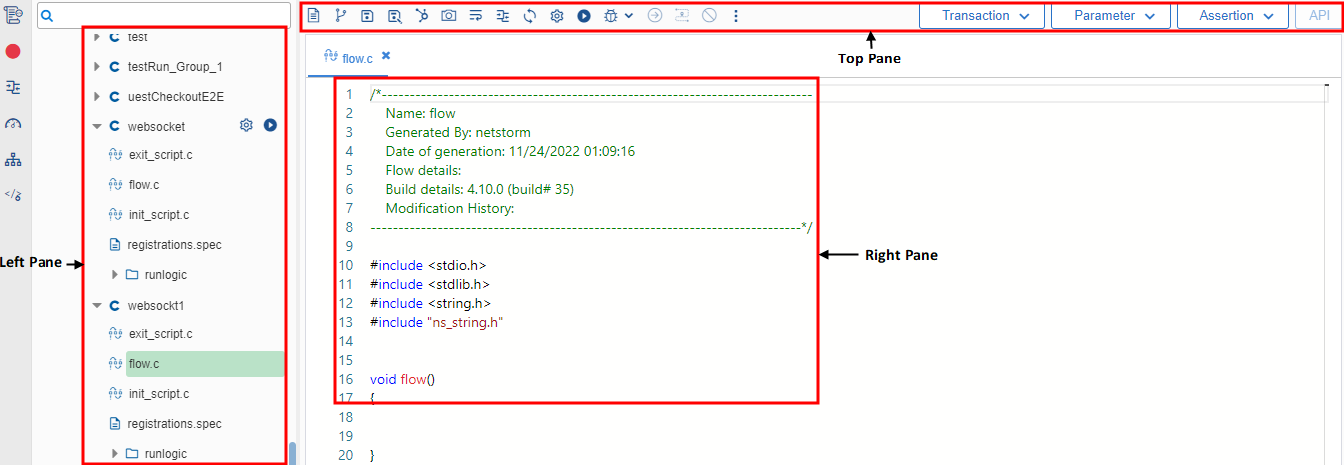
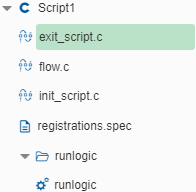

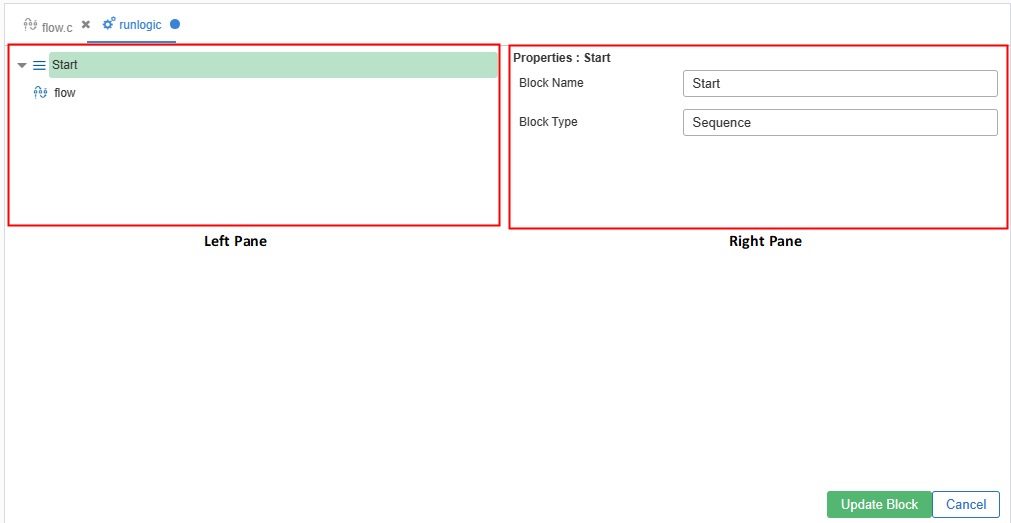
Left Pane
Left pane consists of block and flow. Whatever option is selected the corresponding field is shown in Right pane. Block is any node of tree having at least one child. A block can contain pages or another block within itself. User have the following option in block:
A. Block
- Insert Block: If user select the Insert block
 option, he has to fill the corresponding fields of block name and block type and select the update block button.
 - Insert Flow: If the user select
 , corresponding right pane give the option to select the flow which needs to be inserted.
 - Move up/down: User can
 select option to move up or down the order.
 - Remove: The user can click on
 icon to remove the block from runlogic.
B. Flow
- View: Click on the
 icon to view the script.
 - Move up/down: User can select option to move up or down the order.
- Remove: The user can click on icon to remove the block from runlogic.
Toolbar
The toolbar consists of following option:

- Save
 : This saves the RunLogic. This validates if all properties of blocks are satisfied before saving it.
 - Collapse All
 : To collapse the blocks and pages. This collapses all blocks and pages inside the blocks.
 - Calculator
 : It is used to calculate the runlogic. This opens a new window where PVS can be auto-calculated based on the scenario type and the parameters.
 - Rename RunLogic: To rename a RunLogic, click on
 icon.
icon. - Copy Runlogic: To copy RunLogic click
 icon.
icon. - Reset Tree: This resets the currently modified RunLogic to previously saved RunLogic, click
 icon.
icon. - Download Runlogic: : This downloads the RunLogic tree. Users can save this file, click
 icon.
icon. - Delete RunLogic: To delete RunLogic click
 icon.
icon.
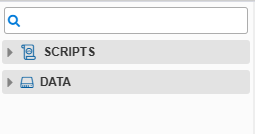
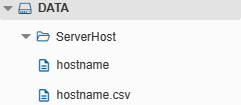
Data
Al the data directories are shown here, User can select a data directory and see data files present in the data directories.

SR# | Icon | Meaning | Description |
1 | Create New File | To create a new file/directory as per the requirement. | |
2 | Create Flow | To create a new blank flow in the script | |
3 | Save | To save a file after editing. | |
4 | Save All | Save all the file opened in as tabs in the editor. | |
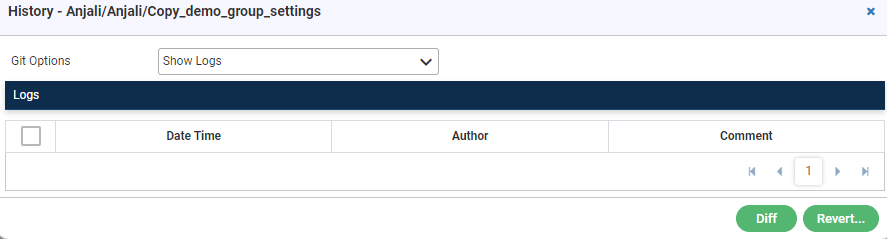
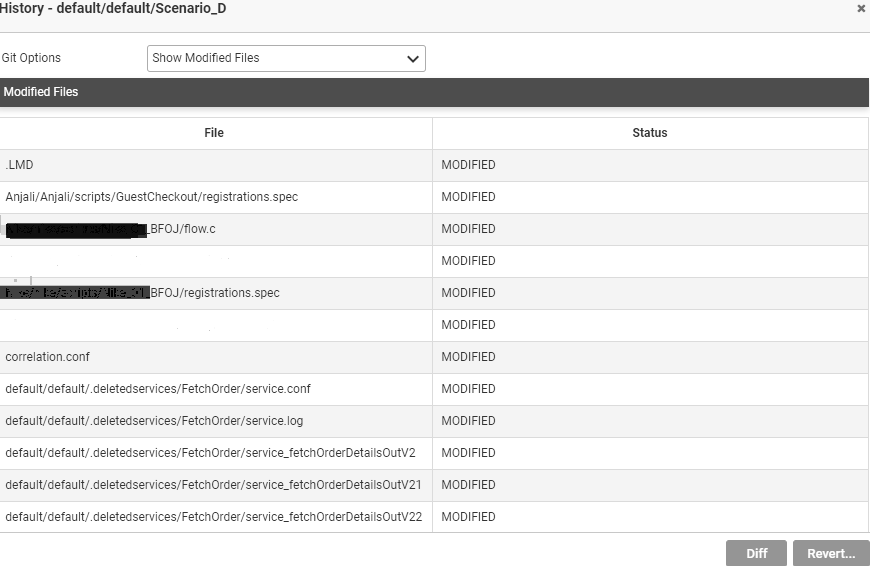
5 | Version Control | To view the version control history of the script. | |
6 | Snapshots | To see the snapshot of pages of a script. | |
7 | Word wrap | Confines the data in the file within defined margins. | |
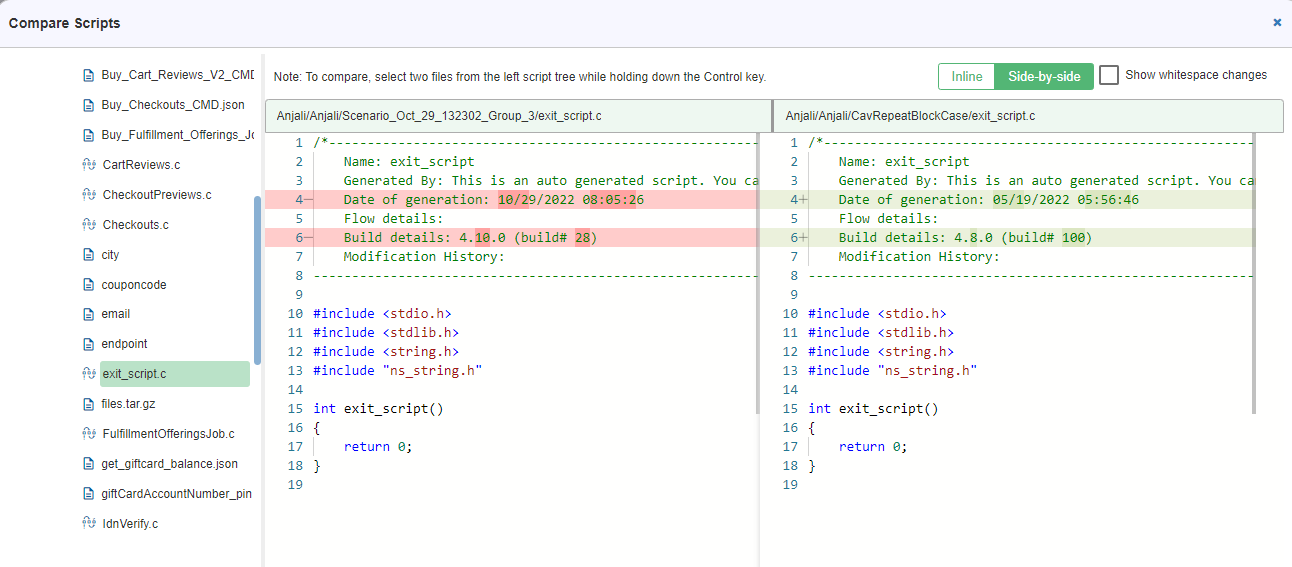
8 | Compare Script | To compare two scripts. | |
9 | Synchronize user’s script | To refresh the script manager GUI. You can sync the scripts at the project, subproject, or script level. | |
10 | Compile Script | To compile a script. | |
11 | Test Script | To execute the script from the script manager. | |
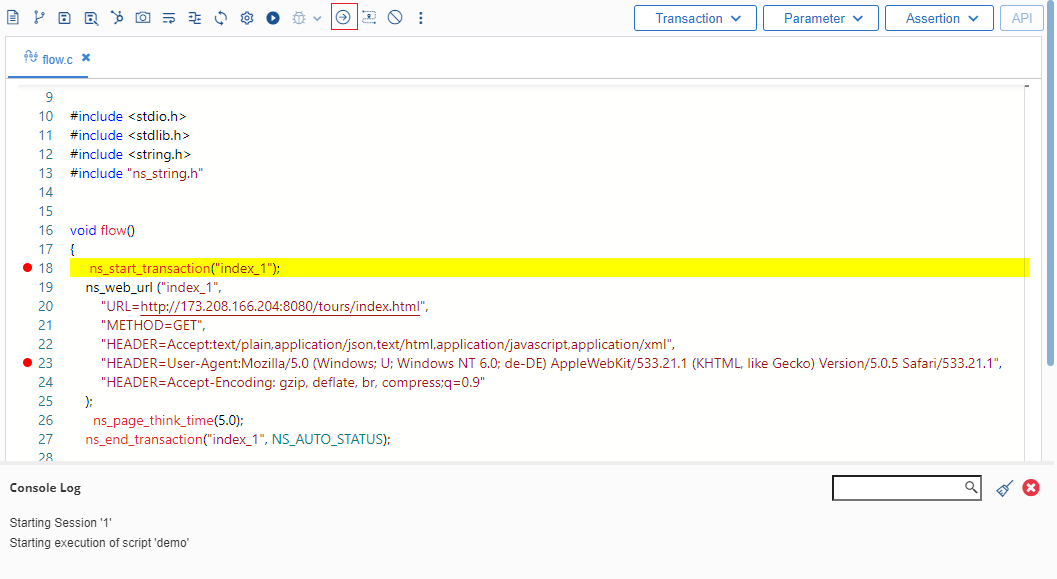
12 | Debug Script with 1 iteration | User can choose one or more iterations to debug the flow/ script with break points. | |
13 | Continue | To start the script replay and pauses it at the next breakpoint of the script. | |
14 | Step by Step | To run the script one line at a time. | |
15 | Stop Test | To stop the test. |
Create File/Directory
As the name suggest, this helps to create new file/ directory as per the requirement. For this click the icon. Once you click the icon, the following page opens:
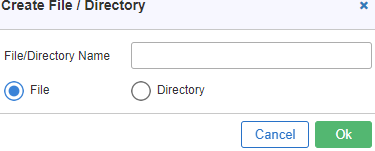
Enter the file or directory name as per the requirement. It is used to create a new file/directory inside the script.
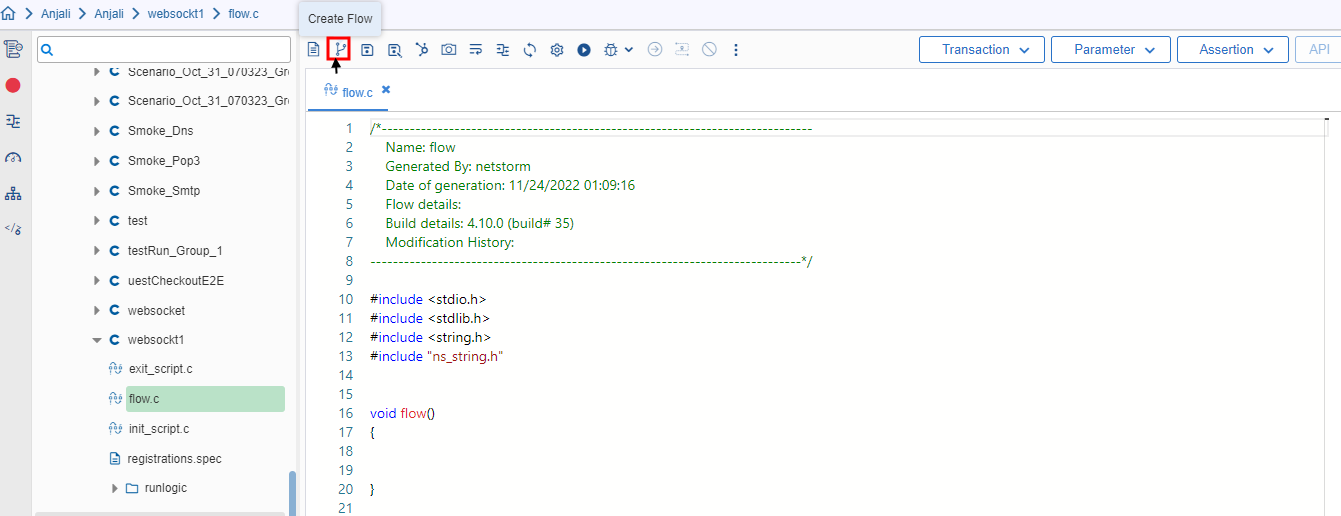
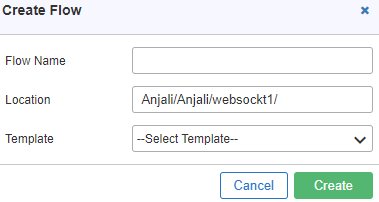
Create Flow
The ‘Create Flow’ option is used to create a new blank flow in the script. On clicking this option, a pop up window is displayed in which the user can select a project name and a sub-project name to create a flow file in that script and add pages/URL transaction manually into the flow file.
Steps to create a flow
- Click the Create Flow
 Icon on the Top Pane.


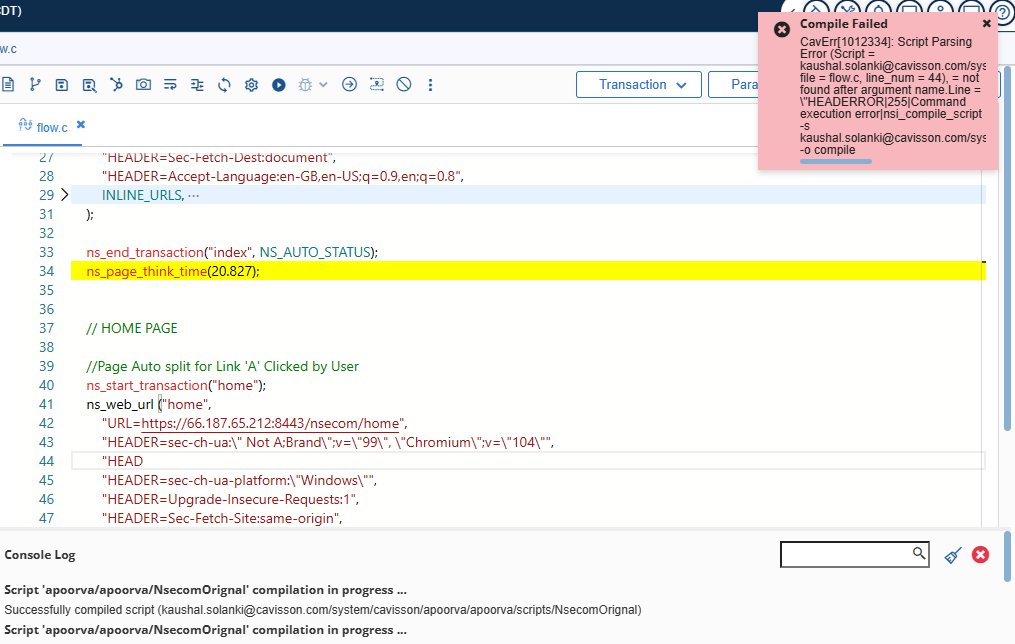

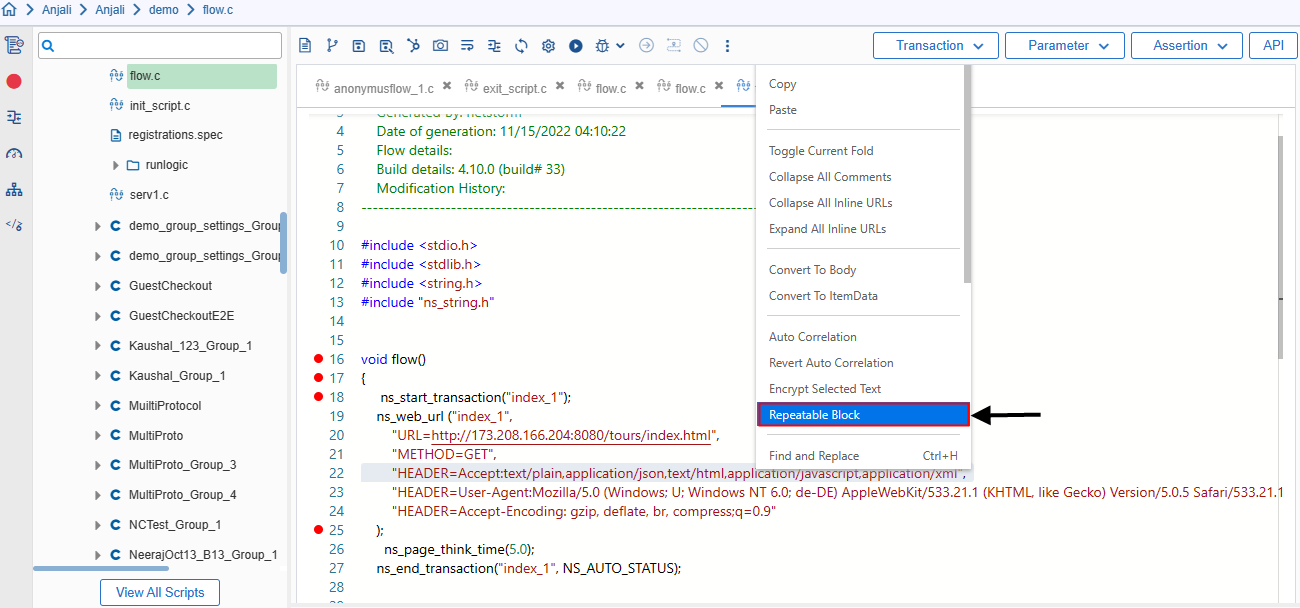
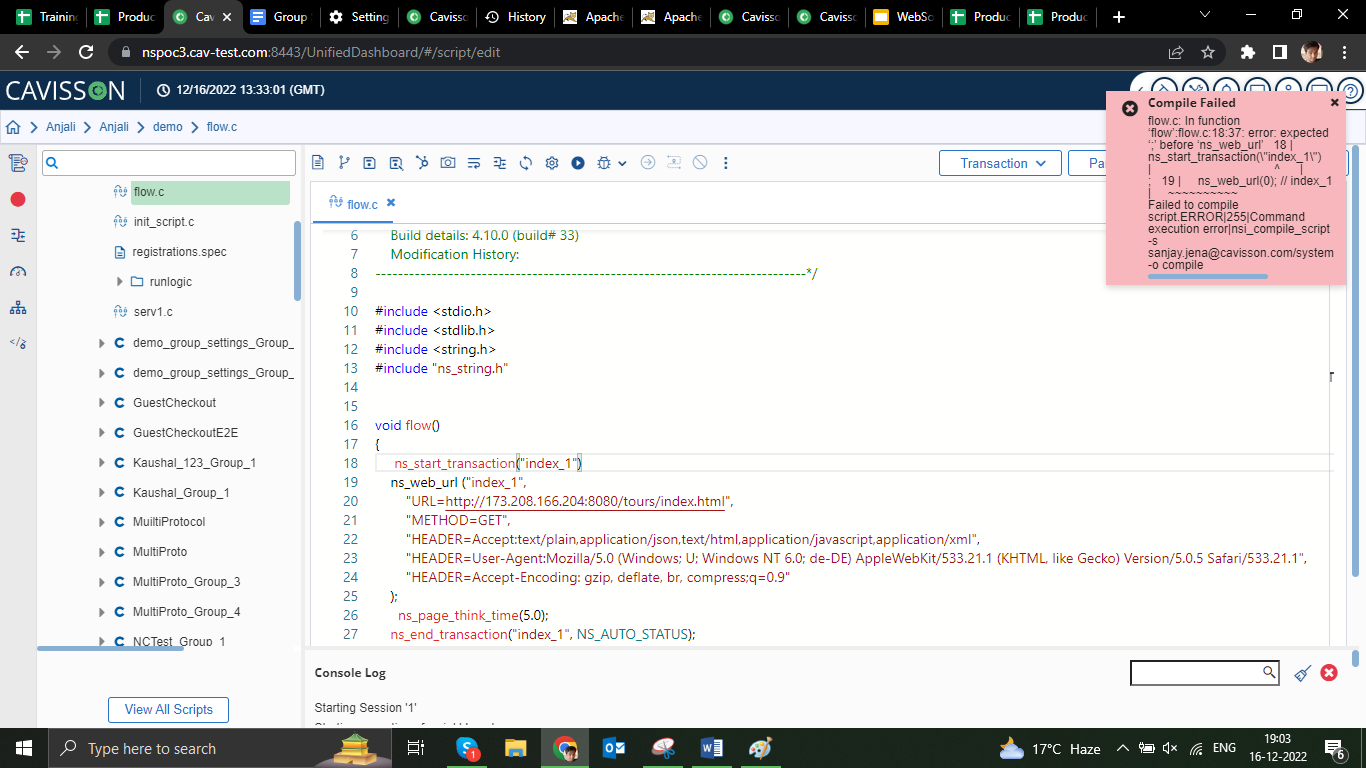
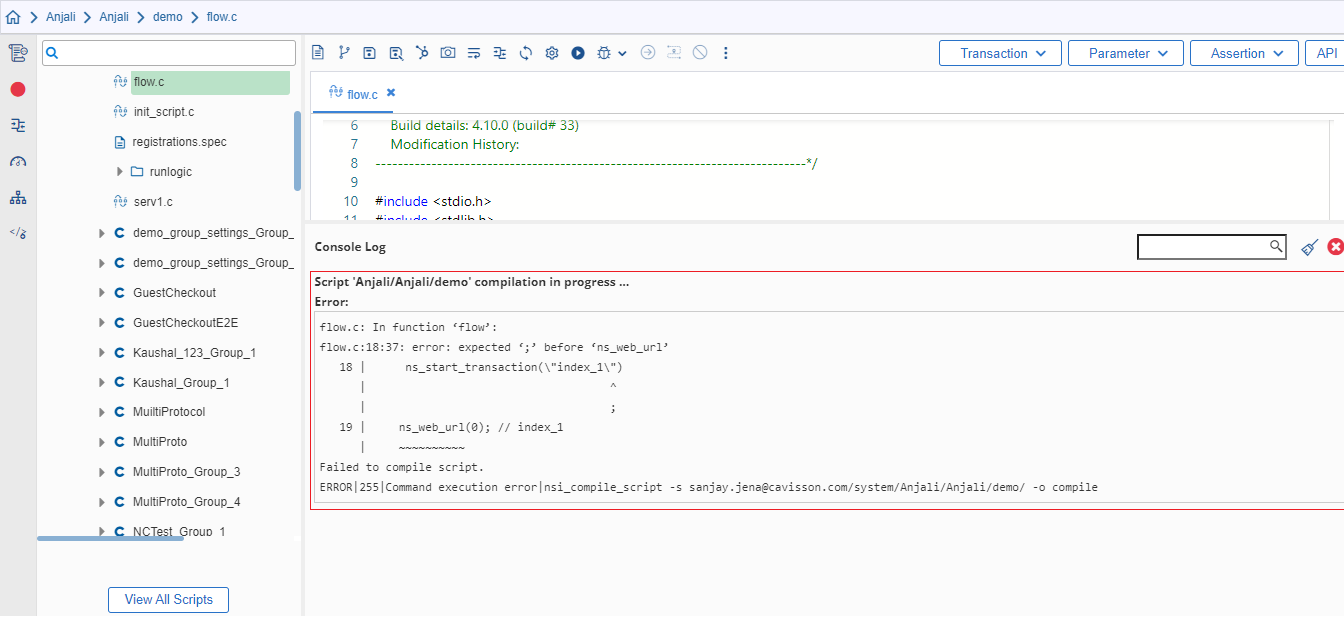
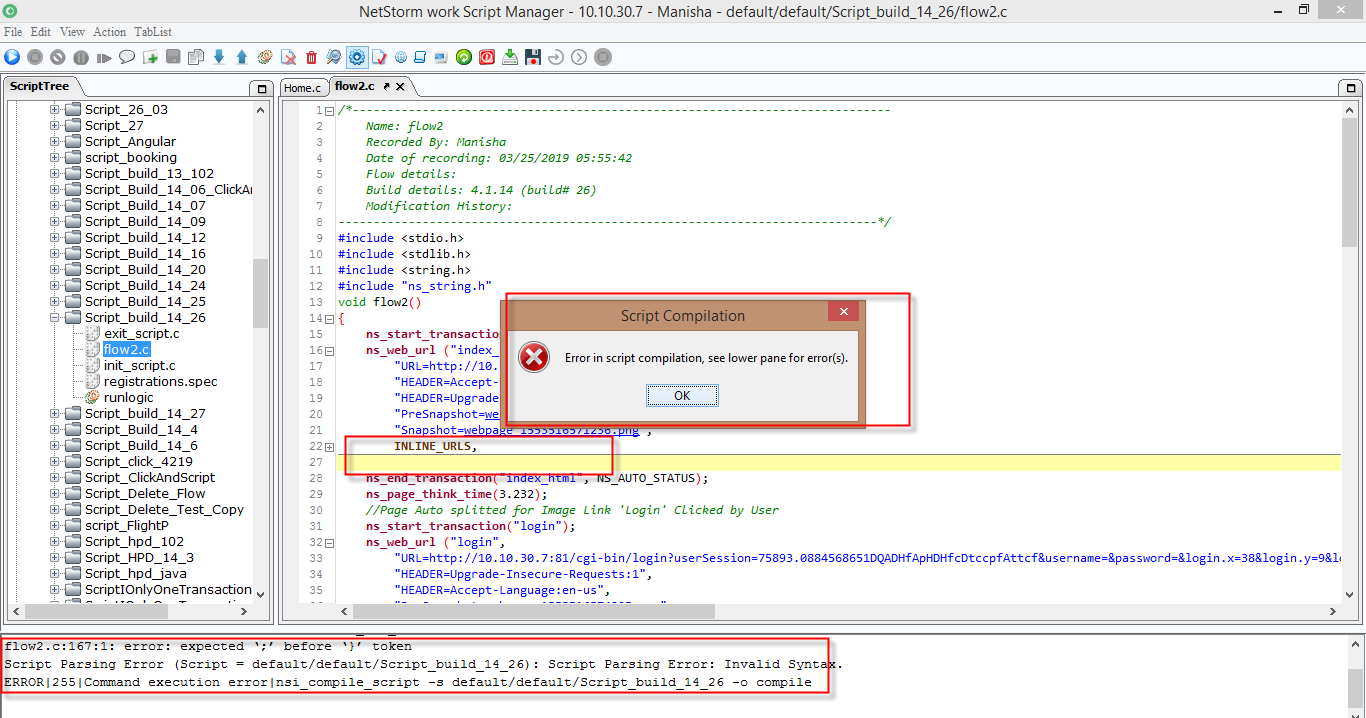
Highlighting Missing API Close Brackets in Script Compilation
During script compilation, if there is any syntax error in multiline API, like if ‘);’ left in multiline API, LoadTest highlights the error for the same.
Continue
On selecting this ![]() icon, the script execution is started from the first break point and jumps to the next breakpoints.
icon, the script execution is started from the first break point and jumps to the next breakpoints.
When a user clicks the ![]() icon, the script execution is jumped to the next breakpoint and executes the intermediary steps.
icon, the script execution is jumped to the next breakpoint and executes the intermediary steps.
Step by Step
On selecting this option, the execution is done line by line. It starts the script replay and then pauses it on the next line of the script.
When the user clicks the ![]() icon, the execution is performed in a sequential manner line by line.
icon, the execution is performed in a sequential manner line by line.


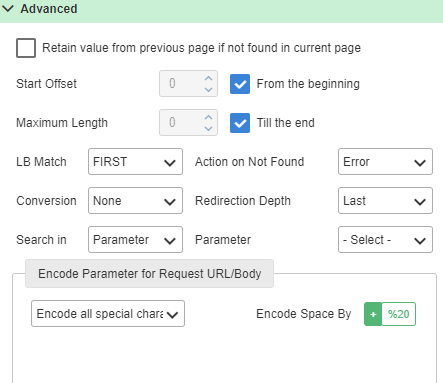
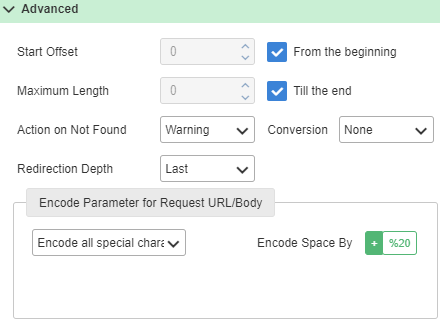
You have to click the
 Icon to view all the options in the Advanced section.
You will get the following option in Advanced:
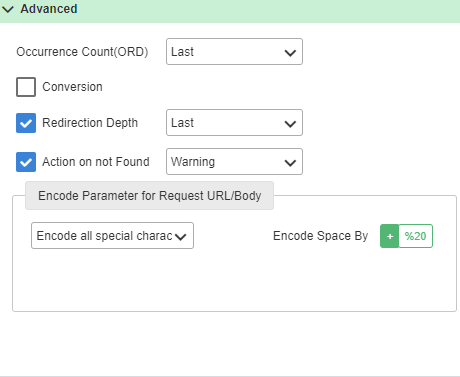
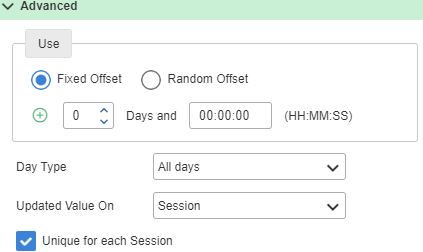
- Retain Previous Value: This option provides a facility to users by which they can able to retain the previous value and also clear the previous value. There are two possible values, the first is RetainPreValue=Yeswhich retains the previous search value, and the second is RetainPreValue=No that don’t retain the previous search value. The default is Yes.
- Start Offset: If the pattern searched by Load Test is of length 20 but suppose the requirement is to pick data from the 5th In this case, Start Offsetcan be used. It is enabled when From Beginning check box is disabled. If the Start Offset value is set to 5 then it truncates the first 5 characters and saves this altered data, starting from the 6th position to the last position, in the searched parameter variable. Save Offset value can lie in the range of 0-100 (inclusive of boundaries). Users can also specify whether to consider a complete length or a specified length.
- Maximum Length:If the pattern searched by Load Test is of length, say, 20 but suppose the requirement is to pick data till the 4th last position. In this case, Maximum length can be used. It is enabled when Till the end check box is disabled. If the Maximum Length value is set to 5 then it truncates the last 5 characters and saves this altered data, ending from the 6th position from the last position, in the searched parameter variable.
Note: You will also get the option to select the checkbox, if you want the maximum length to be till the end.
- LB Match: This option is used to select LB in case of multiple LB. By this argument, the user can select the LB that he wants to use.
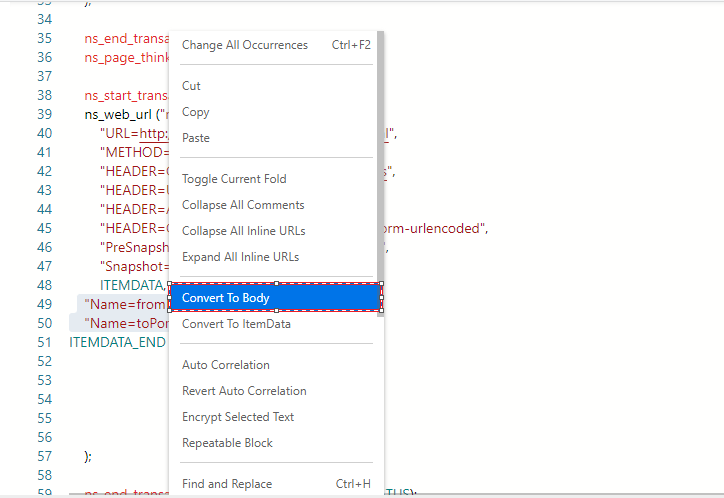
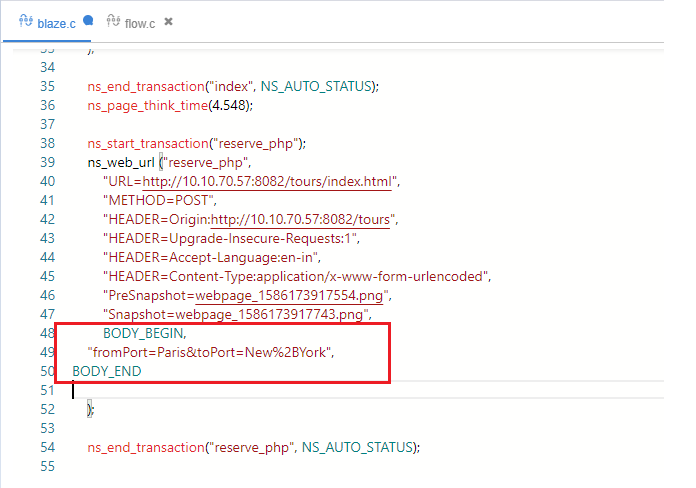
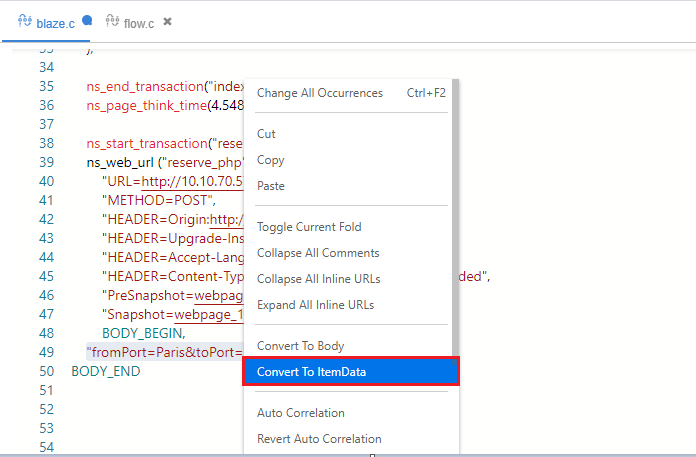
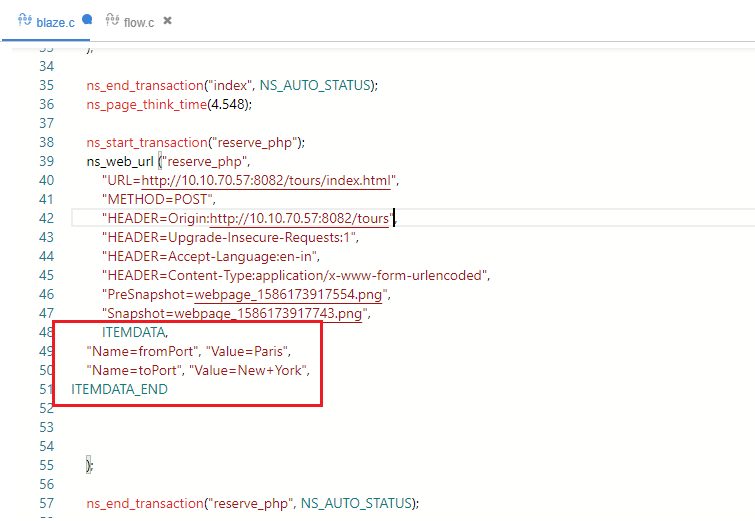
- Conversion:This option is used for converting the searched data to some other format. By default, there is no conversion. So, the data is placed in the request as it is. But if the user wants to convert this data into URL format, then this option comes into the picture. If the search parameter is used in the URL portion, then all of the special symbols are encoded. But if the search parameter is used in the BODY portion, then to encode special symbols, the following ‘Header’ should be used on that particular page:
HEADER=Content-Type: application/x-www-form-urlencoded.
- Search in: By applying ‘Search Parameter’, Load Test searches on the response page. If the user wants to search some data in the value of any ‘Search Parameter Variable’, in that case ‘Search in’ is used i.e. ‘Search in’ searches in the value of the search parameter variable. Users can have the following options:
- Body
- Header
- All
- Parameter
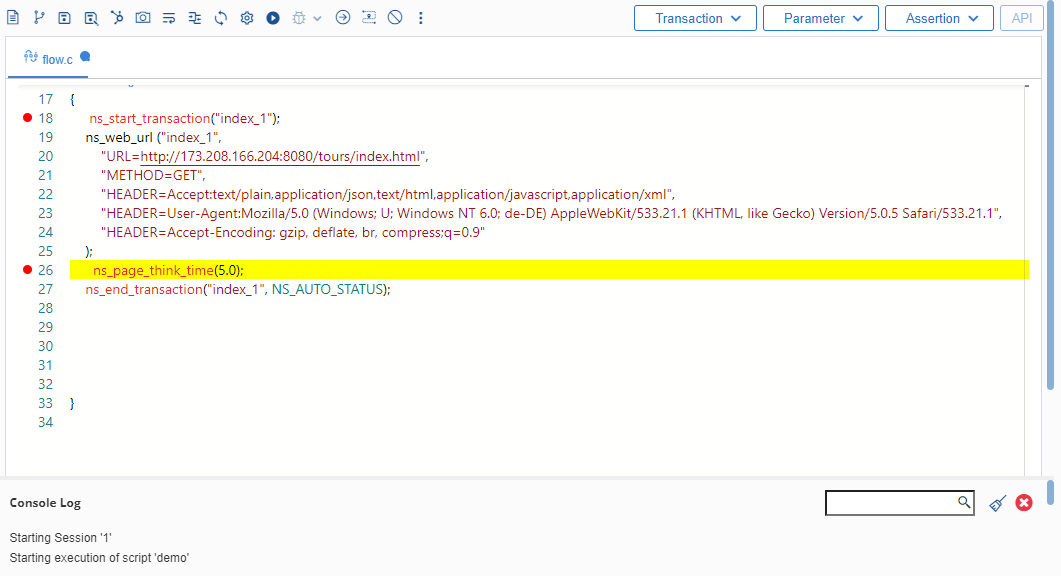
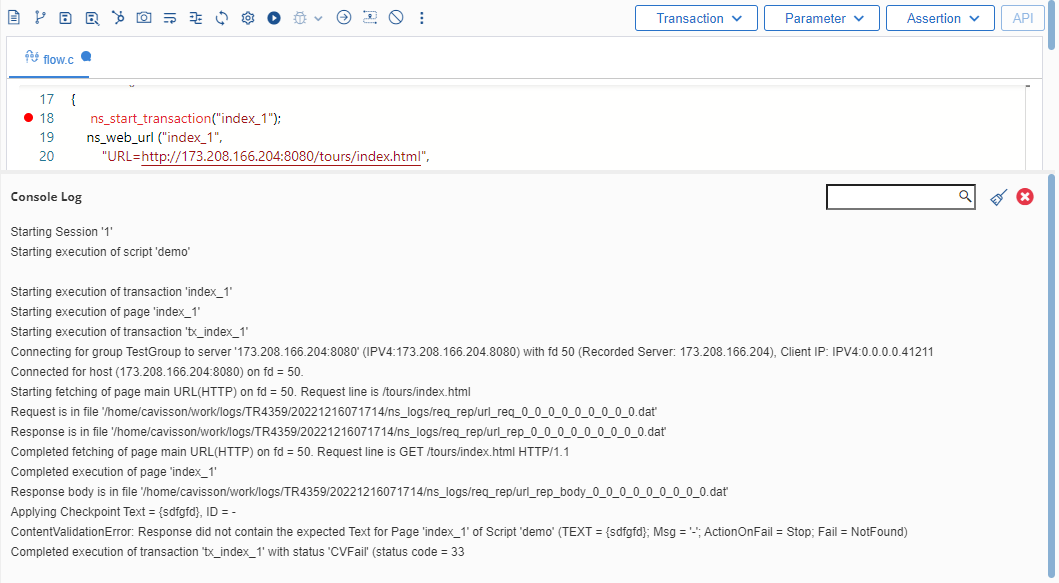
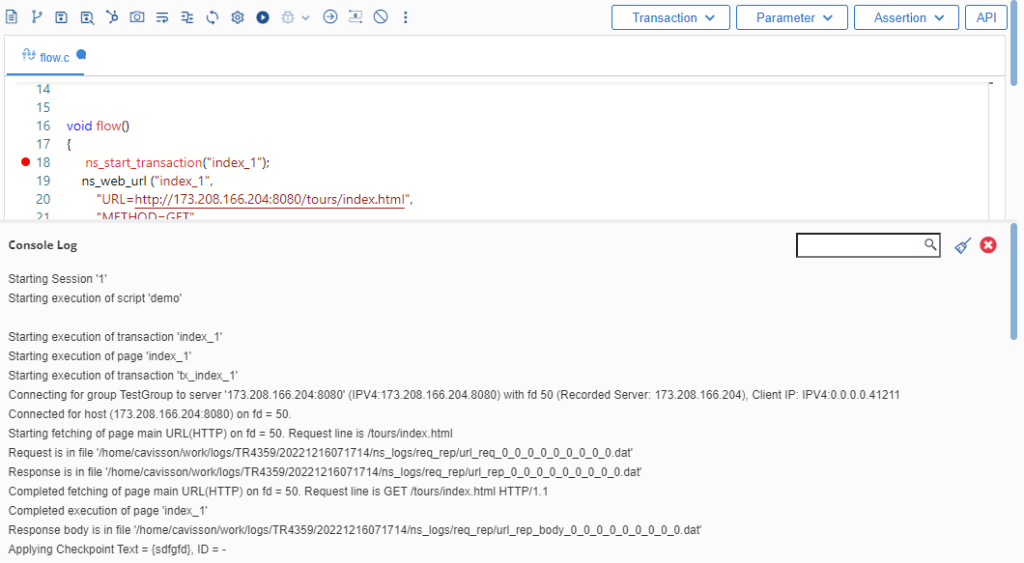
- Action on Not found: If the pattern, for which Load Test is searching, is not found, then the user can make Load Test behave in the following ways:
- Warning: If this option is used and the pattern for which Load Test is searching, is not found then Load Test displays an error message in logand continues its operation.
- Error: If this option is used and the pattern, for which Load Test is searching, is not found, then Load Test displays CVFail in reportand log and terminates further processing.
- Redirection Depth:If the page, on which Load Test is searching the pattern, is moved to some other location, then this option is used. It specifies how many moved locations Load Test is supposed to search for the pattern i.e. up to what redirection depth Load Test searches the pattern. By default, if a page is moved, then Load Test does not search on that page. There are the following options:
- Last: If this option is chosen, Load Test searches on the last redirection.
- Numerals ranging from 1-32: Load Test searches only up to the depth which is equal to the numeral selected.
- All: Load test searches till the last redirection depth.
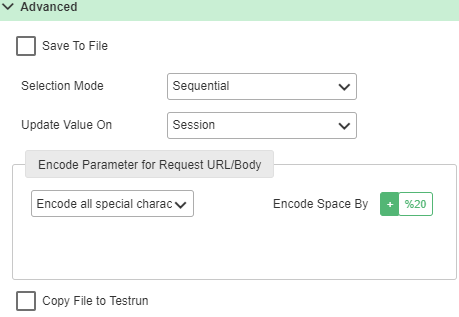
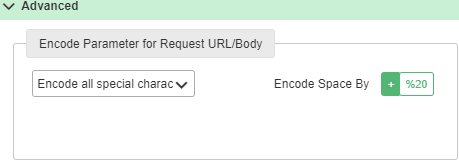
- Encoding Option: Encoding is used to encode special characters to their ASCII value. Users can encode any number of special characters i.e. all, specific, or none. User can have the following options:
- Encode all special characters except (+), (-), (.), (_): All special symbols except + – . _ are encoded. It is the default value.
- Encode only specified characters: The user can specify which special characters to encode in Characters to encode.
- Do not encode special characters: None of the special characters is encoded. However, space is encoded always.
- Encode Space By:This option specifies to Load Test how to encode Space. User can have two options: ‘+’ or ‘%20’. If ‘+’ is chosen, Load Test encodes Space by ‘+’ and if ‘%20’ is chosen, Load Test encodes Space by ‘%20’. The default value is ‘+’.
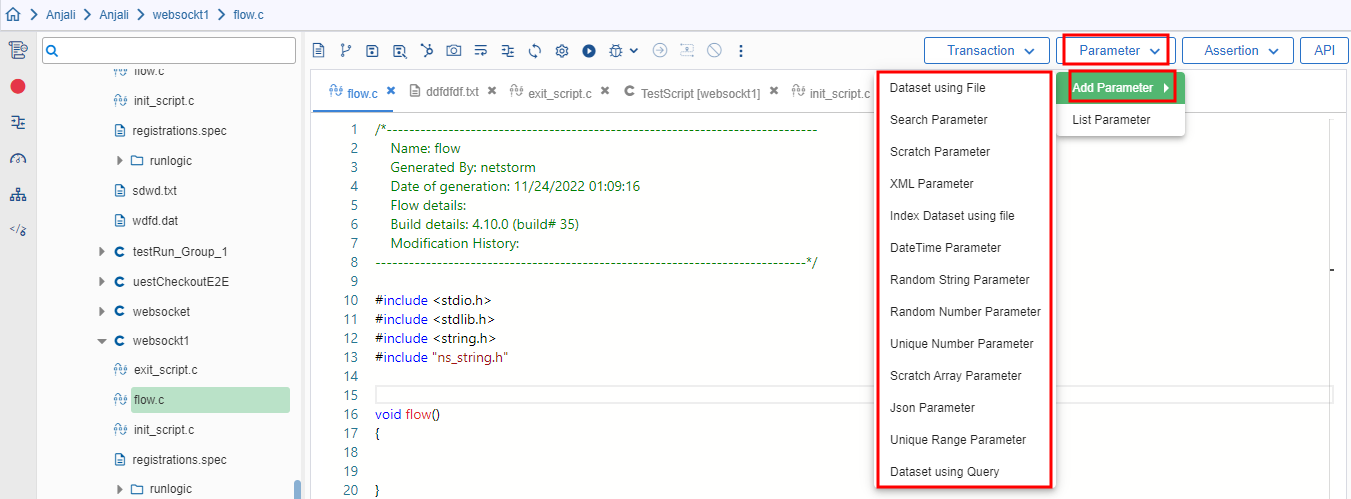
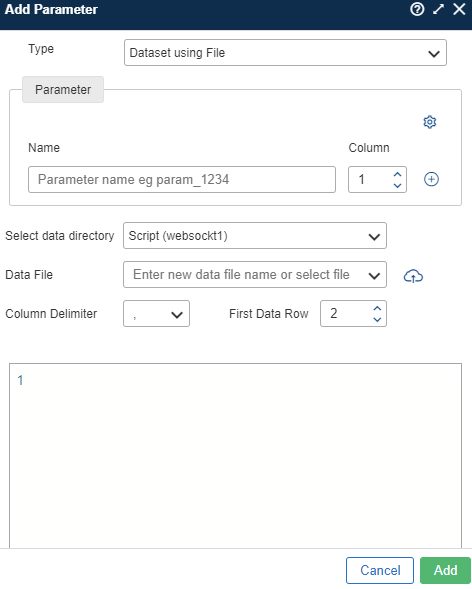
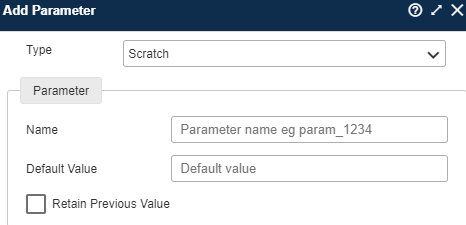
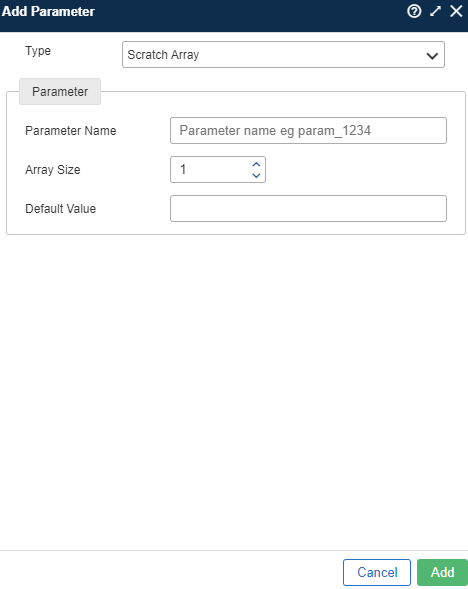
Scratch Parameter
Scratch Parameter formerly called as Declare Parameter, is a parameter whose value is initialized by the user. This parameter value does not change automatically. The user has to write code for assigning its value.

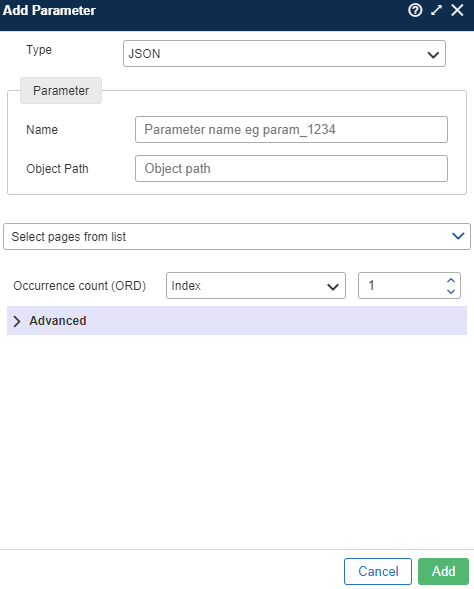
Adding The Parameter
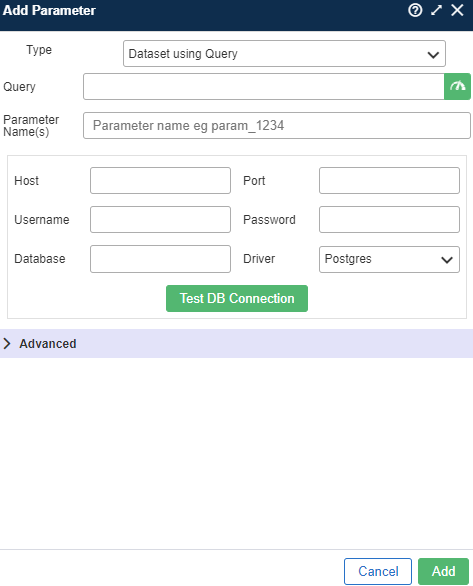
The following fields need to be filled to add Dataset Using Query Parameter:
- Query: Query is a question which is communicated formally. It can either be aselect query or an action query, for e.g. select name, price, size, id from items_table where skuid=S80 and price >= 1000.
- Parameter Name: This field is used to set the name of the Parameter, which is used in the parameterization of the script with curly braces {}. It is a mandatory field.
For example:sid,browserplugins,bpcompleted,bpabandoned,channel,trnum.
- Host: It is the host name for the database.
- Port: It is the listening port/default port for SQL Server.
- Username: The username of the database.
- Password: The password for a particular user.
- Database: The name of the databases of DSN such as Postgres, MySQL, Oracle, and SQL Server.
- Driver: A database driver is a computer program that implements a protocol (ODBC or JDBC) for a database connection.
Once all the above fields are filled, click the Test DB Connection button to test the connectivity with database.
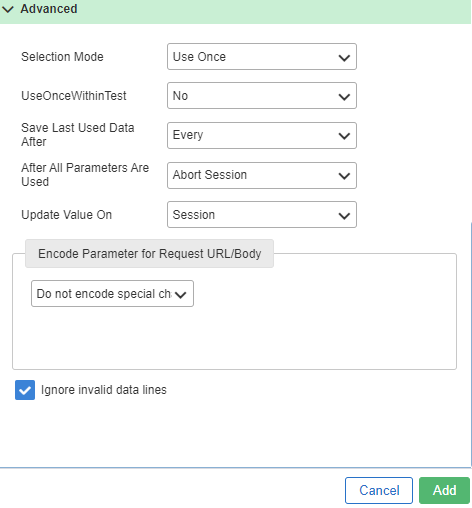
Advanced
Click the icon ![]() to see the fields in the advanced option.
to see the fields in the advanced option.